Setting up OneSignal notifications on your Andromo powered Android App
Increase your app engagement rates with push notifications. Andromo supports OneSignal push notifications. Read on to learn how to enable OneSignal push notifications in your Andromo app.
Onesignal describes themselves as the “market leader in customer engagement, powering mobile push, web push, email, and in-app messages.” They have lived up to their name and certainly are among the top providers of push messaging services. Today, we’re going to show you how to create your free OneSignal account and begin sending push notifications to your Andromo app users.
To complete this tutorial, you will need the following:
- An Andromo account
- An Andromo app published in Google Play Store (if you don’t have one, follow this guide to build and then launch your app and then come back to complete the rest of this tutorial)
- OneSignal Account
- Google Firebase account
Creating your OneSignal & Firebase Accounts
To create your free OneSignal account, head over to https://onesignal.com and click “Start for Free”. OneSignal’s services are free. Enter your details and follow the on-screen instructions to confirm your account creation.
Next up, you’ll need to create your Firebase account.
Firebase is owned by Google. It’s an extremely powerful platform that allows you to manage a large number of Google products from one place. You will need to get a Server Key and Sender ID in order for OneSignal to be able to generate notifications for your Andromo ap.
If you don’t have a Firebase account, follow these steps to create your free account:
Head over to https://firebase.com and click the “Get Started” button. Follow the on-screen instructions to create your account.

- After creating your account, go to the firebase console.
On the console, create a new project and name it whatever you want. Next, open your Firebase project.
On the project dashboard, click on the little cogwheel to open “Project Settings”.
One the Project Settings page, we are only interested in two things: the Server Key and Sender ID. These will allow OneSignal to communicate with Firebase in order to send push notifications.

Now head back to OneSignal and follow the steps below to complete your setup.
Click “Add App” and enter the name of your app.

Next, select Android as your platform.

You’re almost there. Now you need to choose your file type. Select Native Android.
Okay, now enter the Server Key and Sender ID you got from your Firebase account.
Hit save and you’ve completed setup in OneSignal.
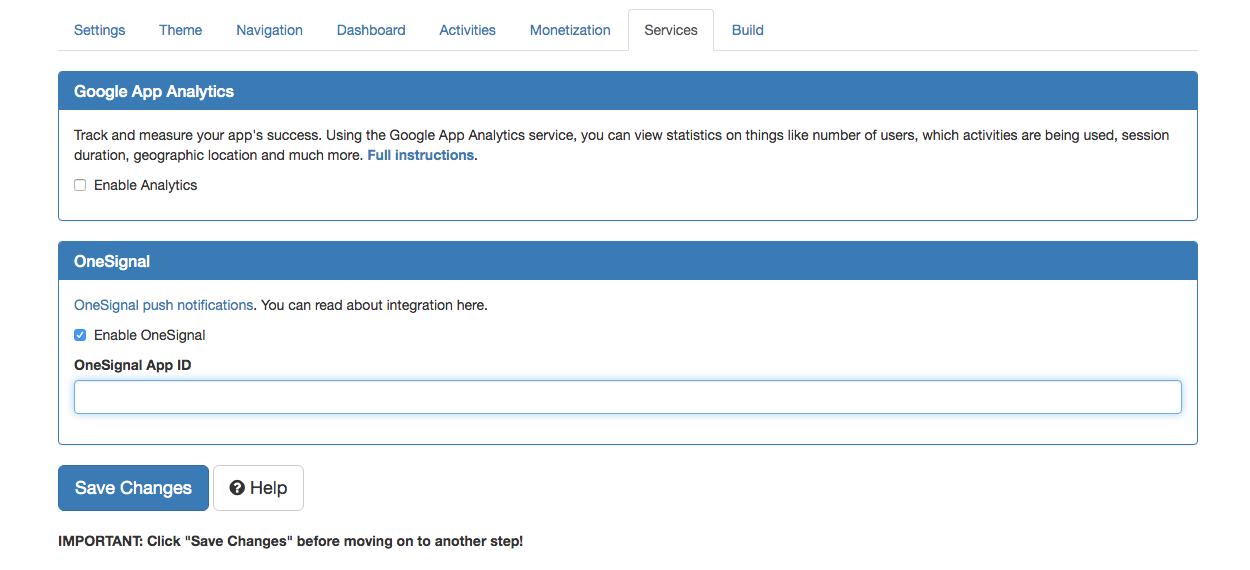
Now log into your Andromo account. Activating OneSignal in Andromo is an easy one-click action.
On your ‘My Projects’ page, click on the drop-down menu on your app project and select ‘Edit Project’.

Click ‘Service’ and scroll down to the OneSignal section and tick the check box. That’s it, you’re done!

To learn how to create and send your push messages, read OneSignal’s documentation here: https://documentation.onesignal.com/docs/notifications